Andrey Smirnov :: workshops

How to work with Sensor-kits

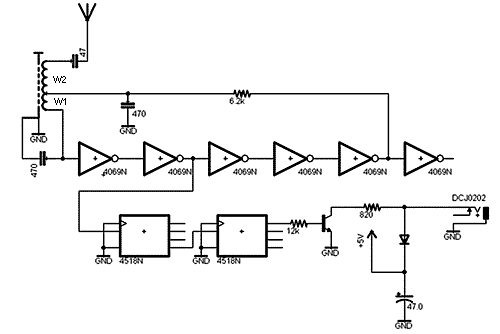
The Sensor Kit contains basic universal D-sensor circuitry oriented on both USB and Analog systems. Any conductive media could be connected to d-sensor as an antenna.

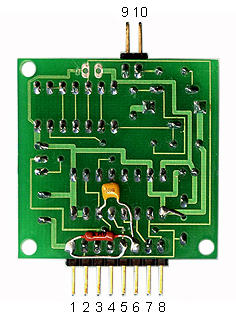
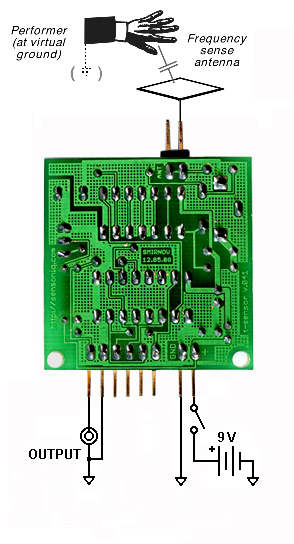
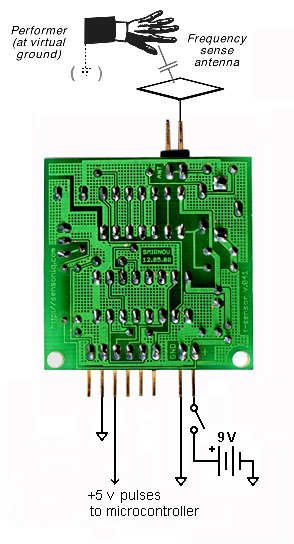
T-Sensor version 0.2 pinout:


1. Ground 0 v.
2. Power +9 v. & extra output for long distance connection
3. Pulse output 0/+9 v. (about 10 kHz)
4. Pulse output 0/+5 v. to microcontroller (about 20 kHz)
5. Ground 0 v.
6. Output to audiocard +2.5/-2.5 v. (about 20 kHz)
7. Hi freq. output. Pulses 0/+5 v. (about 160 kHz)
8. x2 Hi freq. output. Pulses 0/+5 v. (about 320 kHz)
9. Not connected
10. Antenna


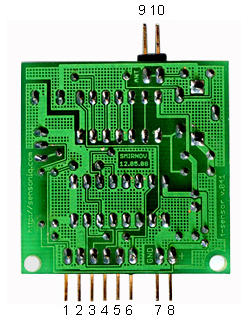
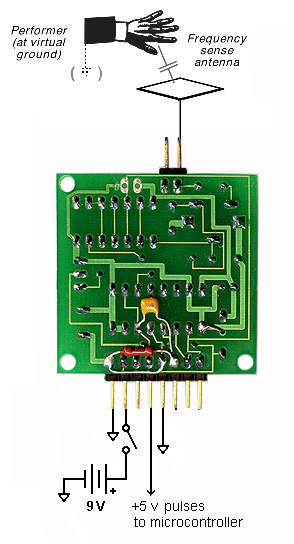
T-Sensor version 0.41 pinout:


1. Output to audiocard +2.5/-2.5 v. (about 5 kHz)
2. Ground 0 v.
3.Pulse output 0/+5 v. to microcontroller (about 20 kHz)
4. Hi freq. output. Pulses 0/+5 v. (about 160 kHz)
5. External Synchronisation input1
6. External Synchronisation input2
7. Ground 0 v.
8. Power +9 v. & extra output for long distance connection
9, 10. Antenna (paralleled).


The way to connect t-sensor to computer audio card


The way to connect t-sensor to microcontroller (Arduino etc.)


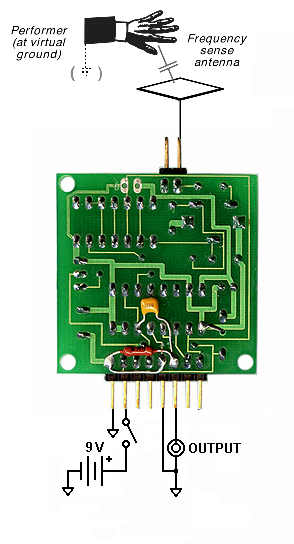
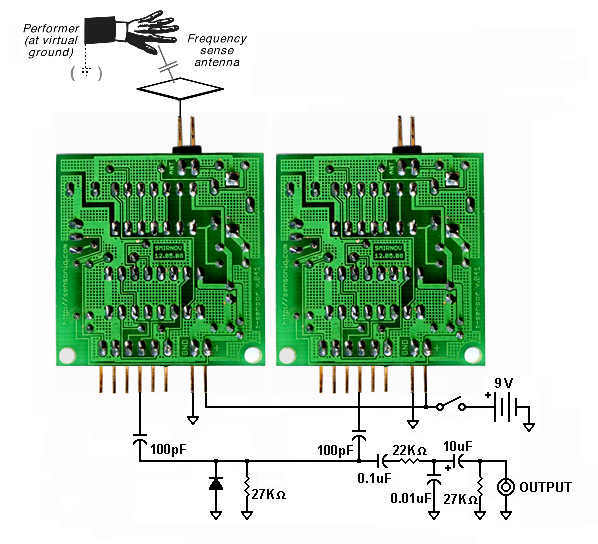
The way to build analog theremin with t-sensor ver. 0.2
Note: Use onboard coils to tune


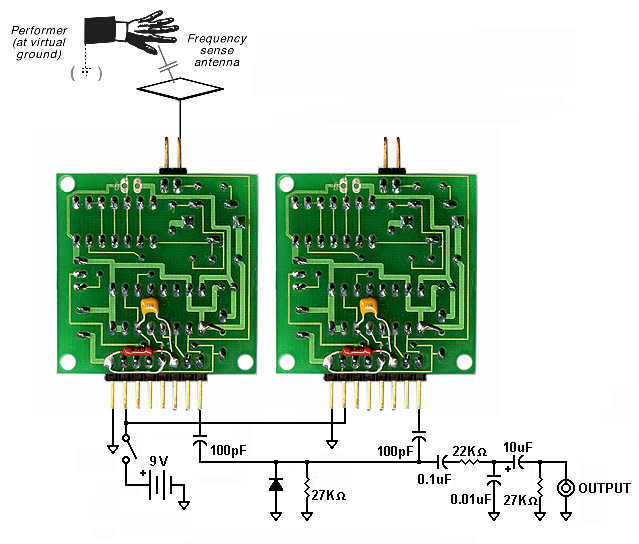
The way to build analog theremin with t-sensor ver. 0.41
Note: Use onboard coils to tune

Learn More:

Theremin Sensors

Theremin Kitchen Workshop

Multichannel interfaces

Theremin Sensors Circuitry

Theremin Coil construction

Tests and troubleshooting

Classical Theremins

Extra Links:

Thereminvision